Garrattfan's Modelrailroading Pages

NBDS 118-119
Painting

As the livery of the NMDS 118 and 119 was very intricate this chapter is going to be very long.
I will go into detail describing it. Maybe it is of interest of some other lost soul searching for answers :-). A long-read so to say.
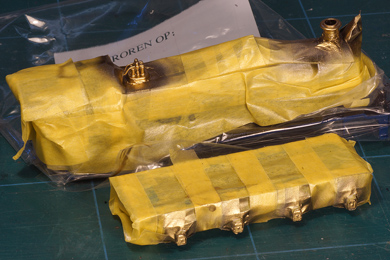
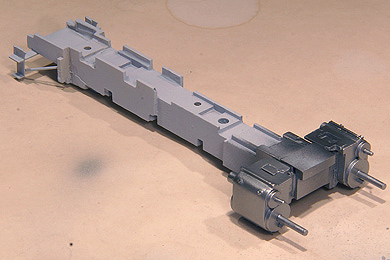
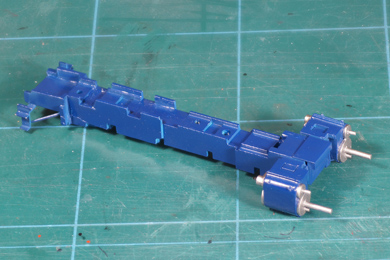
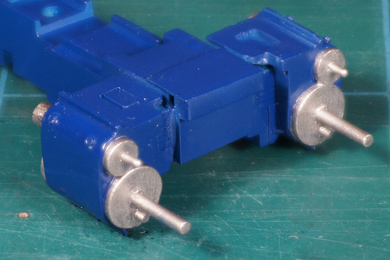
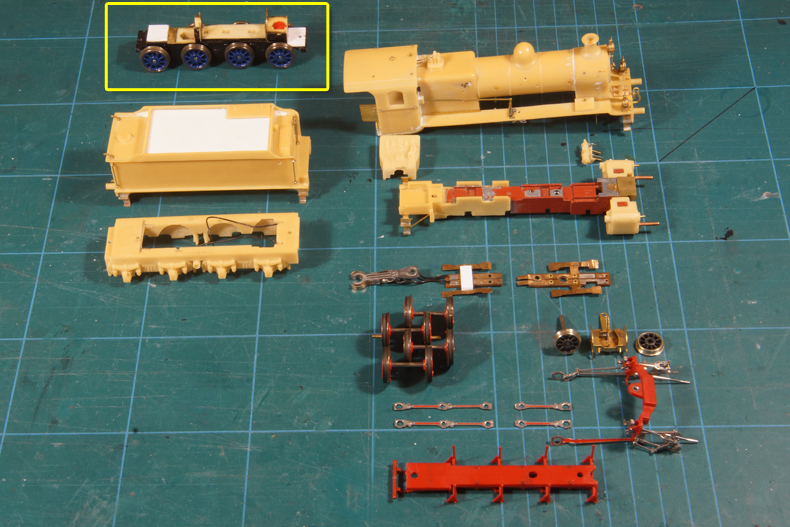
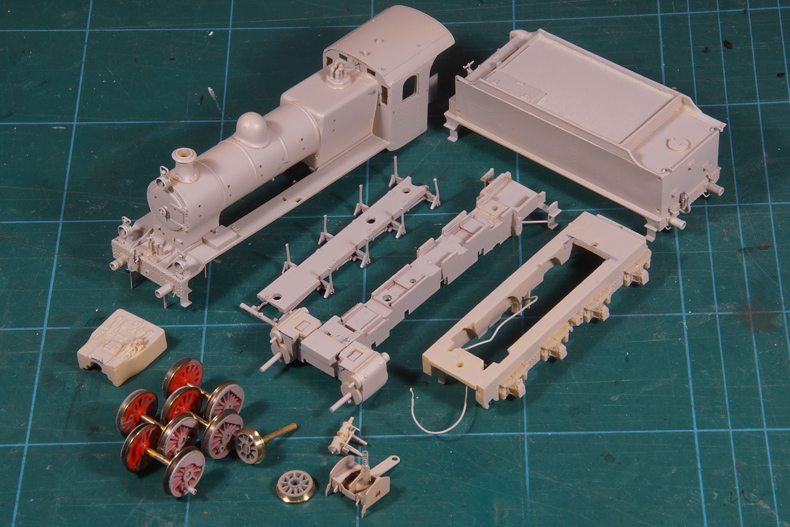
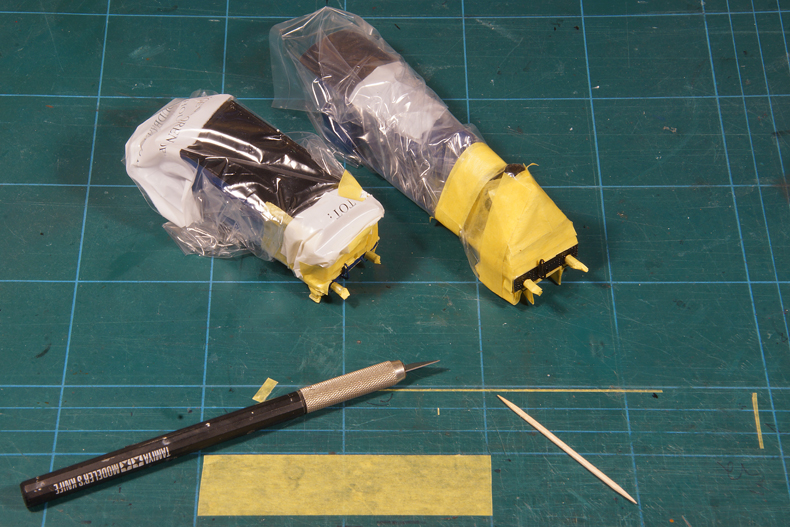
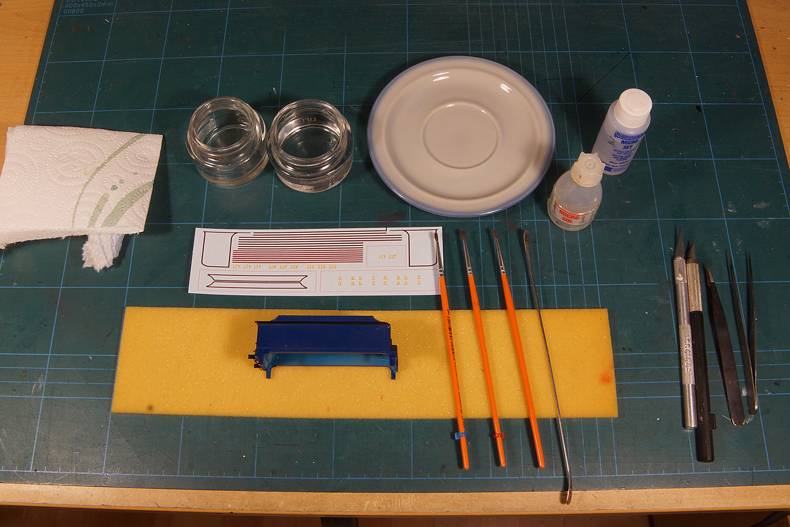
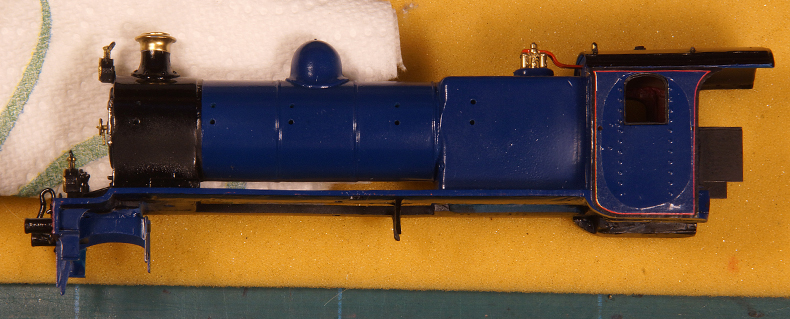
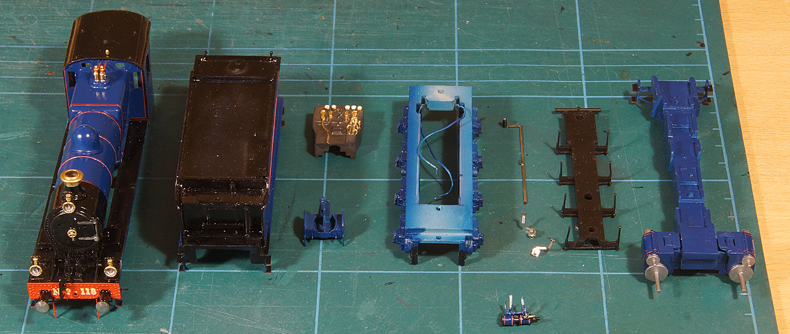
Disassembly and preppingFirst step in the painting process is taking the locomotive apart and storing the parts that need no paint |
|
The only part that I already painted to avoid disassembly is the tender frame (yellow rectangle), so that will also be stored. All other parts need attention. |
|
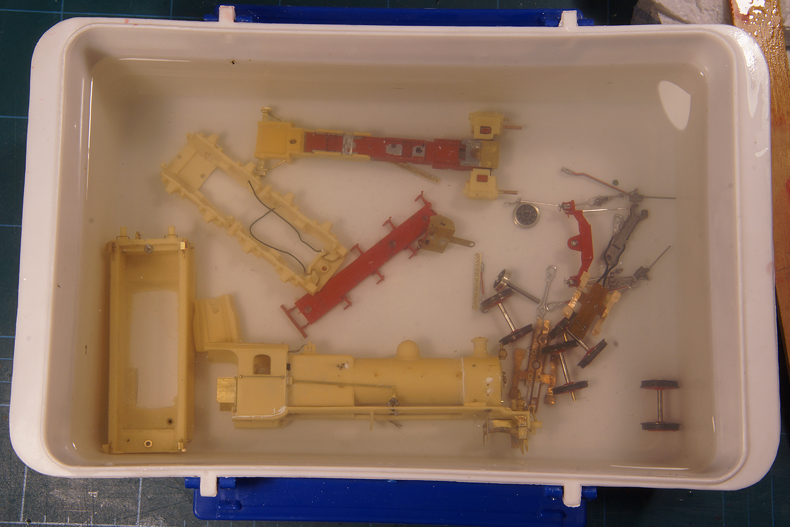
In bath Degreasing follows the following steps
Oh and when draining the fluids pay close attention to the small parts trying to find their freedom. I saw one of the lifting links make its way into sink. Luckily I have a second locomotive to plunder (yes, yes, yes I will order the part as a spare). |
|
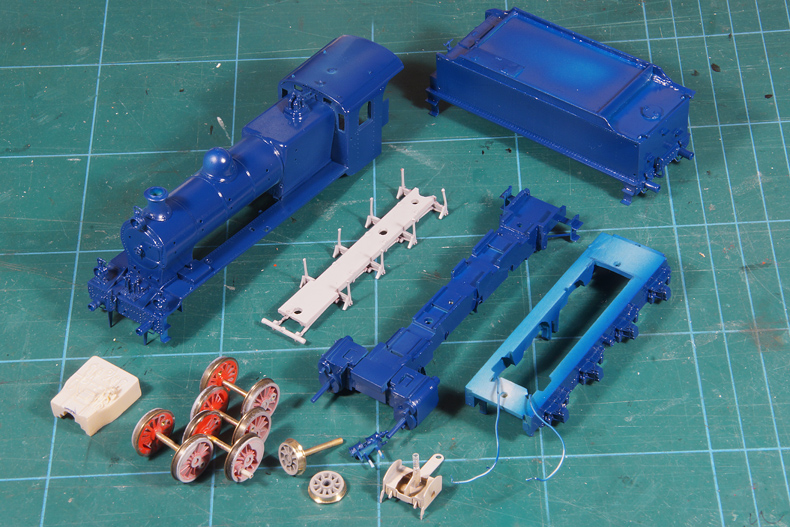
Base coat and first colour
Base coat done, I use a DYI spray filler (Alabastine Spuitplamuur), very very very thin. |
|
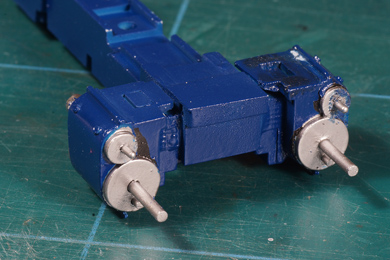
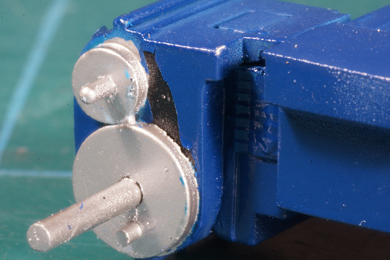
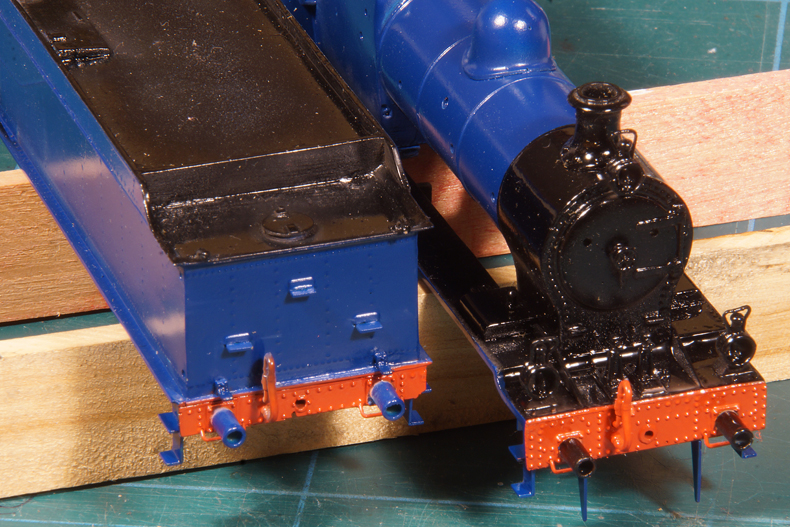
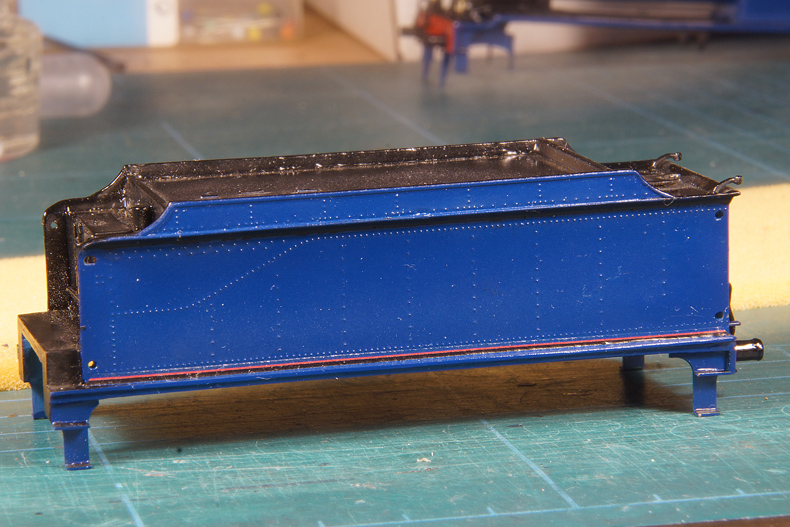
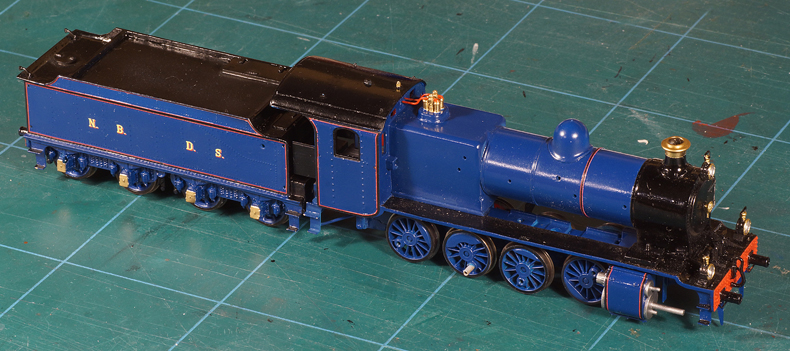
Main components in blue |
|
Masking and consecutive colours |
|
 |
Now loco and tender are masked. I have learned the hard way that painting the blue colour first makes masking less tedious. So I painted the loco blue and then apply black. The other way around takes far more masking. It seems odd but there is a simple logic behind it. In the real world which parts where painted blue? Well, those parts which can be cleaned relatively easy, those parts in relatively easy reach of the crew. So guess which parts can be masked with the least effort? Aha!! |
 |
|
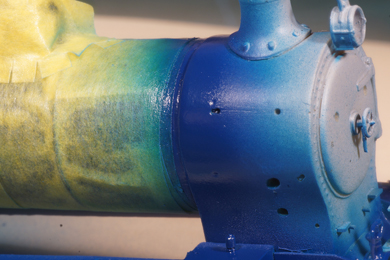
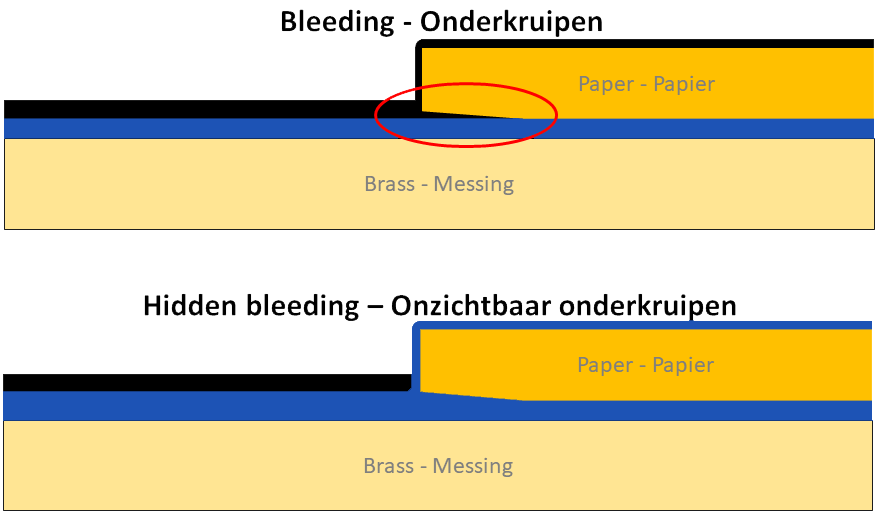
When masking is done I first apply another coat of blue. This is to prevent bleeding, creeping of black paint between the blue paint and the masking tape, the paint being drawn in by capillary action (top diagram). Bleeding results in ugly, irregular black smears betraying your masking was not adequate and needing rework. The trick is that I use bleeding to prevent bleeding. I first spray it in the same colour as the masked layer. If bleeding occurs it will be invisible because it is in the same colour!! (bottom diagram) The new layer does not need to give full coverage. It only needs to be thick enough to seal the openings at the edge of the masking tape. |
|
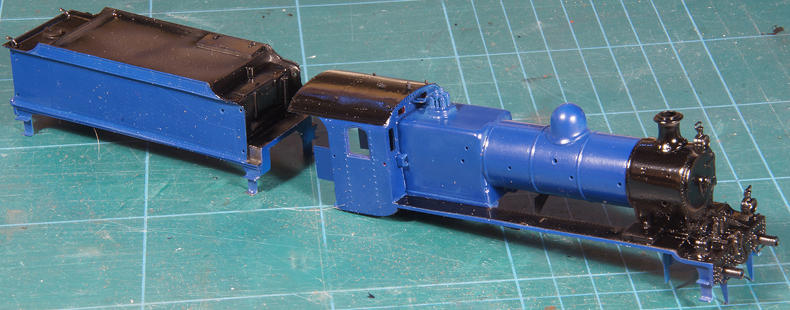
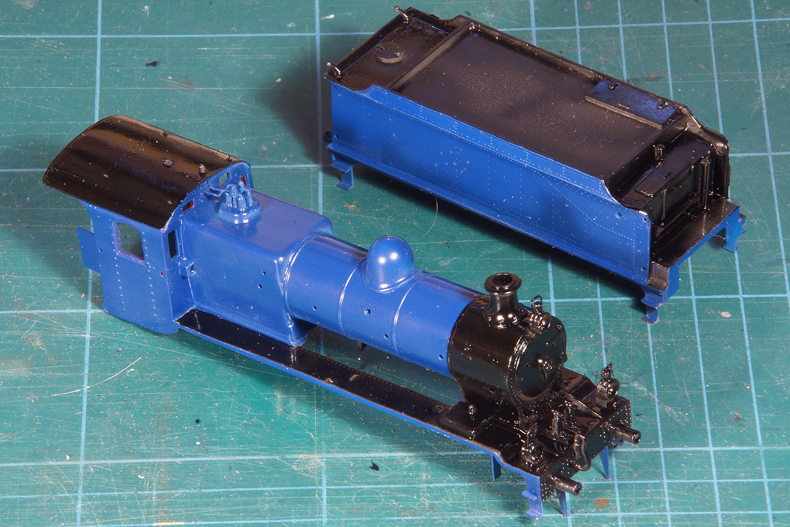
Some touching up needed, but all in all I am happy |
|
 |
|
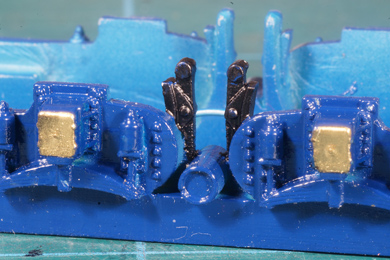
Next step was to mask all of the loco except the buffer beam. Buffer beams are notoriously difficult to mask as there are so many obstacles, so it takes about an hour of concentrated working on one buffer beam to get it fully masked. Then ten second of spraying the old colour to prevent bleeding, some drying time and another ten seconds spraying in red. |
|
I still needed to do some touching up of the blue steps where some overspray intruded but again I was happy with the result. Touching up is done with diluted Philotrain paint and a brush. Officially you can only airbrush Philotrain paint but over the years I have learned to apply a quick coat as touching up job. After drying and clear coating it will hardly be visible. |
|
Detailing the paintwork |
|
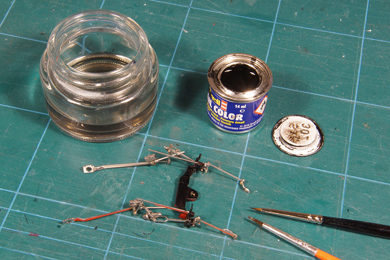
Spot the differences with the previous photo. Detailing with black paint (Revell SM 302). I have found that this black blends in invisibly with the Philotrain black after clear coating. This makes it an excellent touching up medium as it does not interfere with the cellulose based Philotrain paint.
|
|
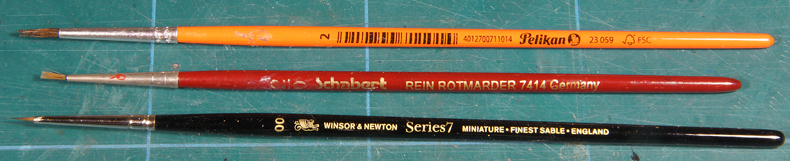
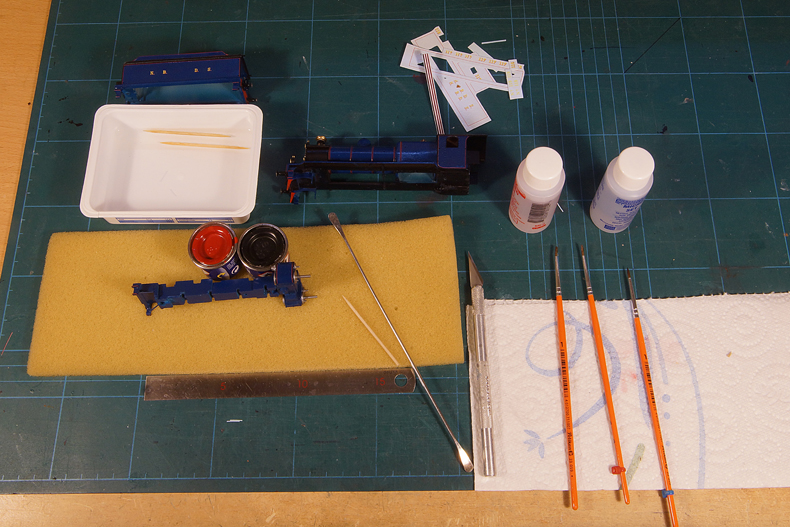
My weapons of choice. |
|
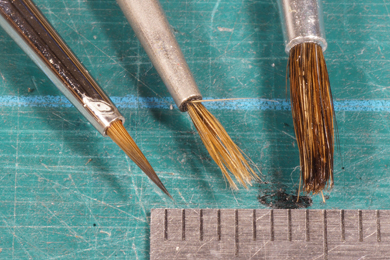 |
It is fiddly work though. I use the Windsor & Newton for the very precise work on the edges. The Schabert is then used to fill the larger areas between the edges. The cheapy (less than £1) Pelikan is only used to take off excess paint. It is kept in a damp condition with a bit turpentine for that. Below is a millimeter scale to show how fine the point of the Windsor & Newton actually is. |
 |
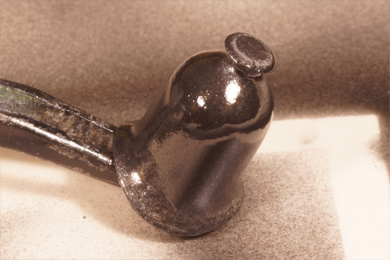
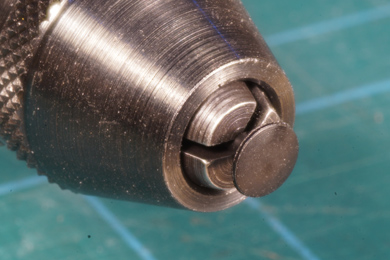
Next thing is to detail a few spots that are brass. Now I have come to unknown territory for me: spraying Alclad II. This stuff is known to give excellent results once you know how to do it. But I have never done it before so it is a wise course of action to and try it once a few test pieces. So out came the bits & bobs box and I had a go at few scrap parts. Then I took the white metal dome of my ever patient once-I-will-build-it-I-promise-cheaply-bought-sacrificial NS 5500. I sanded the dome with 1200 emery paper and gave it a base coat and after drying a few mists of polished brass. One word: STUNNING! And even so I realise the result could have been better if I had tried to polish the white metal before the base coat. Some instruction videos recommend to sand it until 4000, 8000 before even thinking about the base coat.
|
 |
 |
| Base coat | Polished brass |
 |
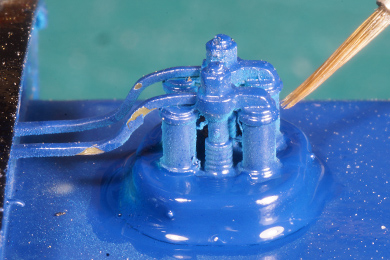 |
| Now comes a really fiddly bit, There are a few places that need to bee brass coloured. The Alclad II is stunning but it has one big disadvantage: it MUST be airbrushed. So I was in for a fair bit of masking. The first bits were done with masking liquid. | |
 |
|
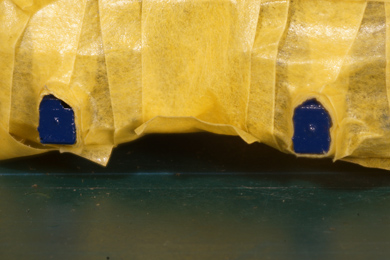 |
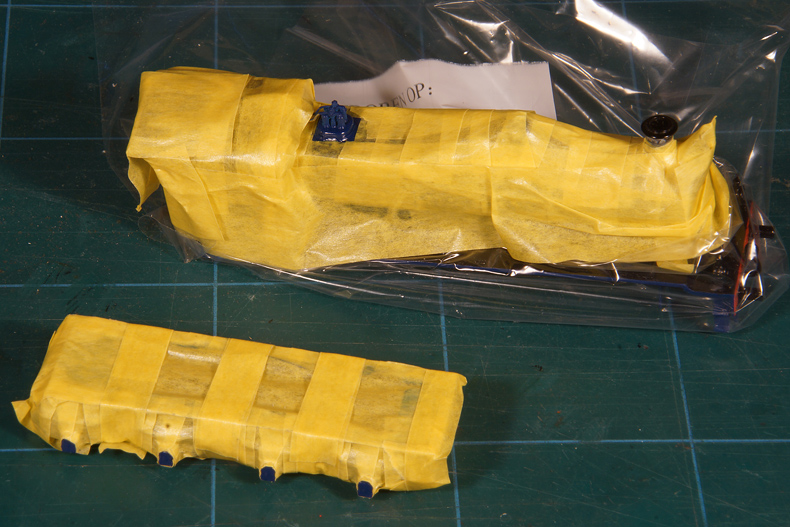
Then the edges of the masking liquid were covered with masking tape and then the rest of the model was covered, either by masking tape alone or a combination of tape and a plastic bag. |
 |
 |
 |
 |
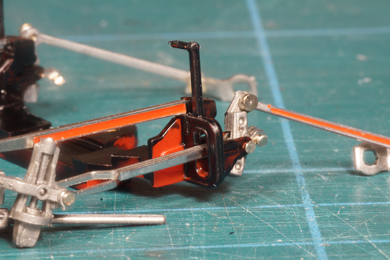
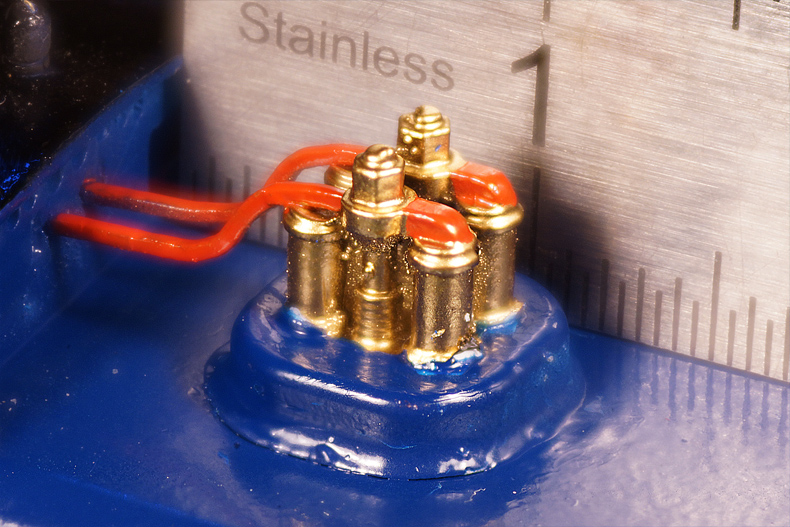
| I sprayed the loco and tender with a black primer. This needed to cure for at least 24 hours, so I got round to doing some other chores like painting the motion bracket (above) and the current wipers (below) | |
 |
|
 |
After the primer had dried the loco and tender were finished with Alclad II Polished Brass. Removing the masking is always exciting. First you must work ever so carefully to prevent damage to the existing and new paint layers. and of course you are curious to see if it worked out the way you intended. |
 |
 |
A reasonable result. Some of the blue paint came off during the removal of the masking liquid. This is a little bit worrying. Maybe the bond between this paint and the resin is not as good as on brass. I will touch the spots up, other than that there is little I can do about it.
|
|
 |
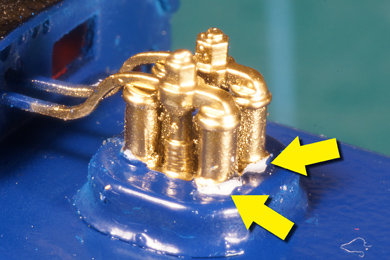 |
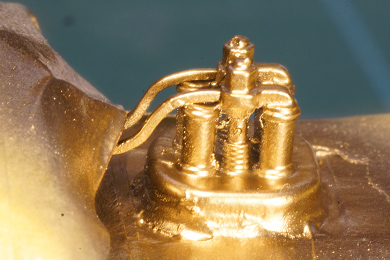
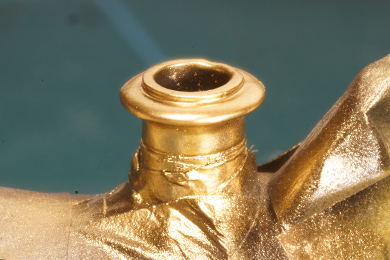
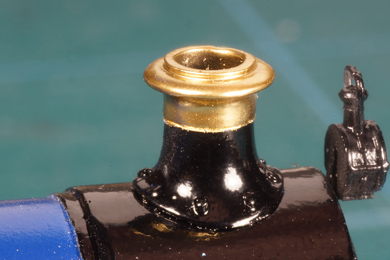
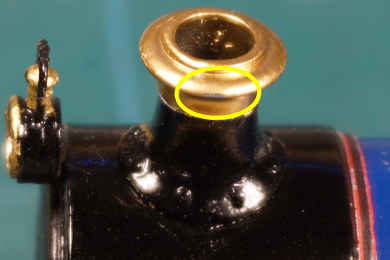
The result on the safety valves is stunning. Again some blue paint came away during the removal of the (dried) masking liquid.
|
|
 |
 |
| The chimney was simply magnificent | |
 |
After complete drying and touching up I painted the safety valve levers bright red. |
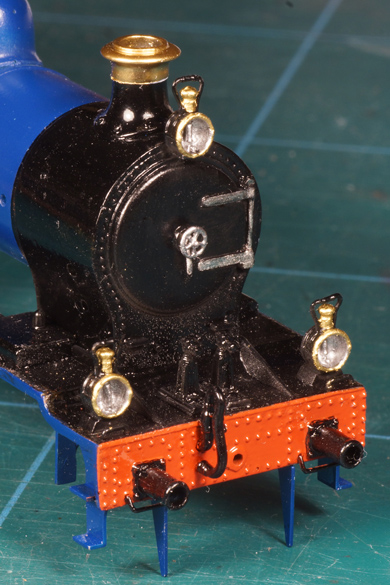 |
Then I turned my attention to painting the front details: smokebox door hinges,handwheel, brass rims of the headlamps. |
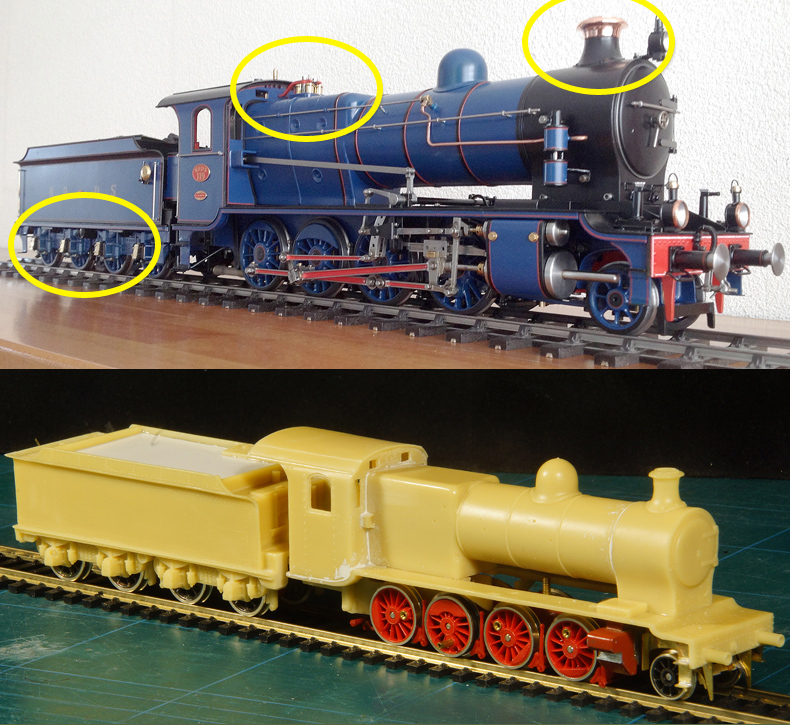
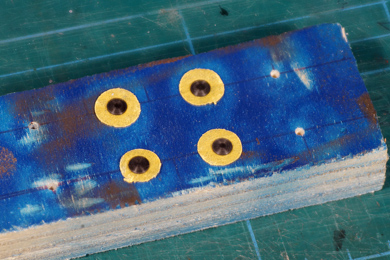
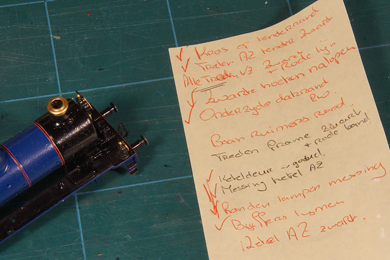
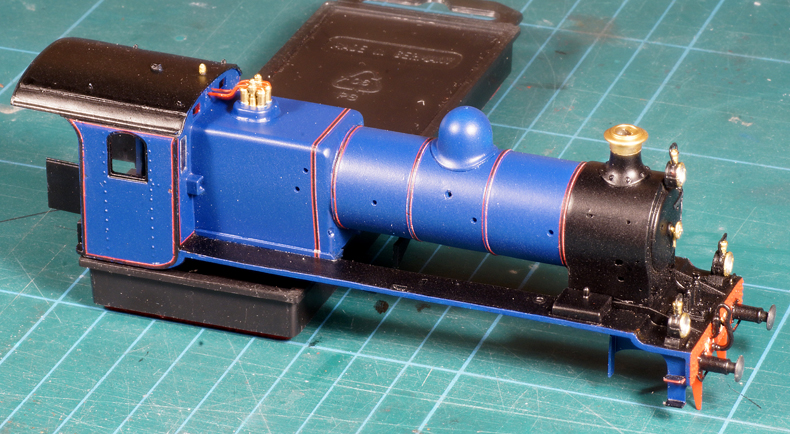
| When the construction of the loco comes to a close I always draw up a to do list. I helps me to remind of things and at the same time limit the work, as a loco is never done. I did the same now . In fact I made two lists: one real to do list and one colour scheme check to see if I did things correctly. The latter helped me find a few errors I had made | |
| The colour scheme checklist. Apart from the Dutch terms the colours say it all, you get the idea. | |
| The actual to do list. The check columns indicate what needs to be done: Add parts, Airbrush (base coat, final colour), hand paint (mostly details), lining and clear coat. | |
 |
Blackening the brakes |
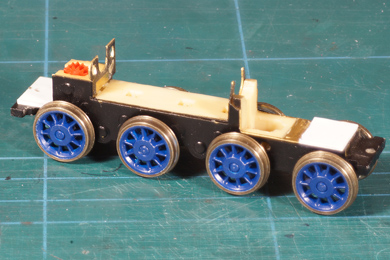 |
I disliked the results of painting the wheels so I dunked them in thinner and started all over. And I was happy with the second attempt. It proves two points
|
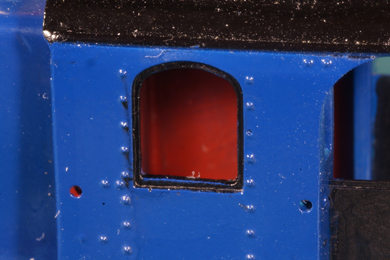 |
Getting a black rim on the cab window |
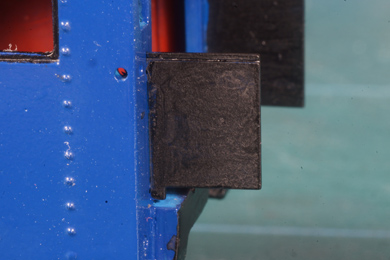 |
Blackening the tender doors |
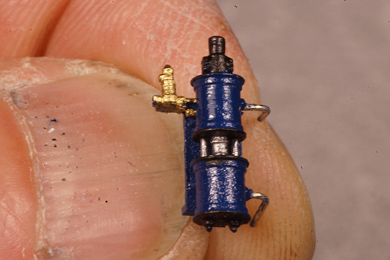 |
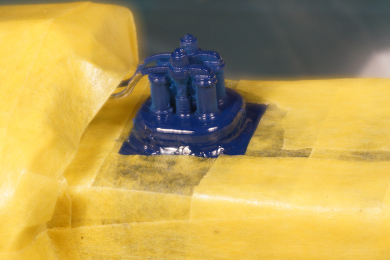
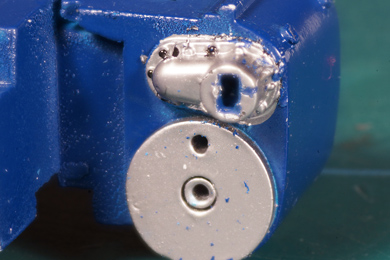
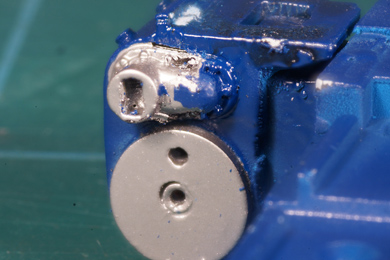
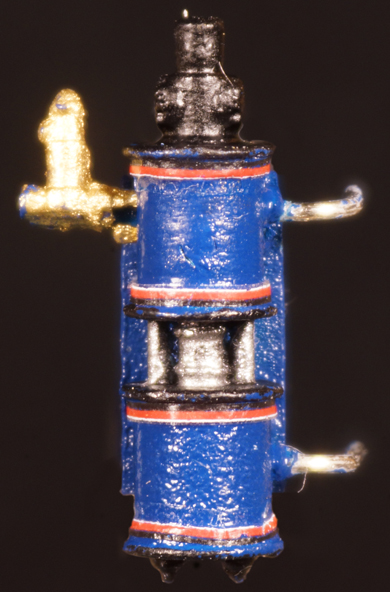
And painting the air pump. Four colours on a detail of only 13 mm high. And that is without the red lining that remains to be done! But because the pump is a very conspicuous detail I thought was worth the effort. |
 |
 |
 |
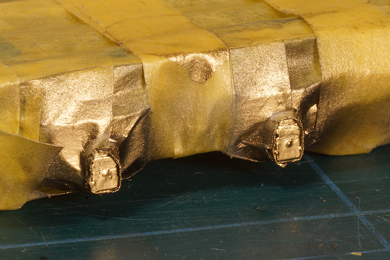
The buffers should resemble polished steel. The rims of the plastic buffer discs had a visible casting edge which I removed by putting it in my Proxxon and gently rotating it against 800 grain emery paper. I also gave the front a short spin on the emery paper which gave it an exquisite circular groove pattern. The buffer were stuck through masking tape and placed on a piece of wood. And after painting with Alclad II the circular pattern beautifully showed up |
 |
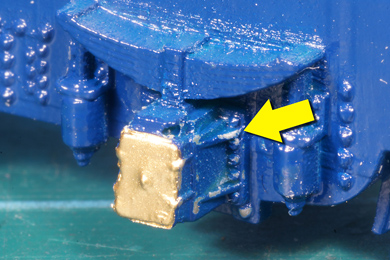
I airbrushed the plastic lifting arm with Alclad II. On the photo it is not so very visible but the left one is a significant improvement over the still original right one. |
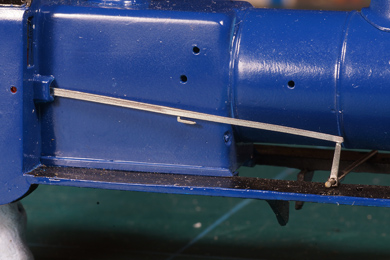 |
Remember I made the reach rod (see the Detailing section)? It was made of brass and it should be polished steel. Again Alclad came to the rescue. |
| It may seems like a smooth ride, with all those parts getting ready one by one. Well, that is only part of the truth, I also had my tribulations. | |
 |
 |
| I had already painted the frame blue when I realised that the cylinder and valve gear covers should be steel. Masking was difficult so I decided to strip the frame and start over with first the Alclad steel. So far, so good | |
 |
I masked the steel parts and then sprayed them blue. Even during spraying I saw things go awry. I knew it was a loss. Nevertheless I completed the operation and removed the masking to see what had come of it. Learn from your failures!
Well, at first sight nothing wrong? |
 |
O yes, the blue had come off when removing the masking tape revealing the black and steel under it. Base coat with unknown adhesive properties. Moreover, unknown masking tape, for once I deviated from my Kip to use Tamiya. Valuable lessons learned.
|
 |
 |
I used MicroScale masking fluid on the valve rear end and it proved impossible to remove without causing damage and neither could I remove it completely.
|
|
 |
But the worst thing was what I already noted during spraying: the Alclad under the blue had dissolved (despite 24 hours drying time). So this is clearly not the right way of working.
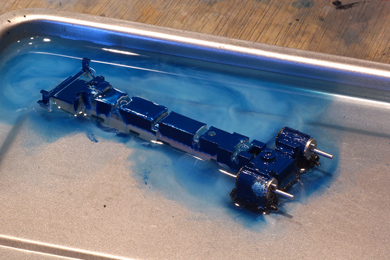
I will strip the frame once more and spray blue first and then Alclad. |
 |
|
So the frame went for a bath. After drying I quickly sprayed a new primer, sprayed it blue and let it dry overnight.
|
|
 |
 |
 |
After much experimenting with and thoughts about masking I decided to paint it by hand. Given a lot of patience and time this gave the best result. On the photos it stille neede some toucing up, but basically I am now happy with the frame. |
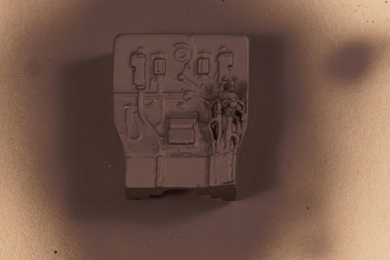 |
The depiction of the boiler backhead was rather simple. I felt the urge to add some details. Fortunately there was one of those rare occasions where some one had taken the trouble to make a photo of the interior. Credits for that go to W. Kriezen who made this photo on 2 September 1926.The photo is published on page 153 of the book De Noord-Brabantsch-Duitsche Spoorweg-Maatschappij, De Vlissinger Postroute (ISBN 9789071513657). As it is under copyright i will not show it here. Taking that photo as a lead. I upgraded the boiler backhead. Of cours it is impossible to model every detail but I chose to add at least those details that were obviously absent on the backhead as supplied. |
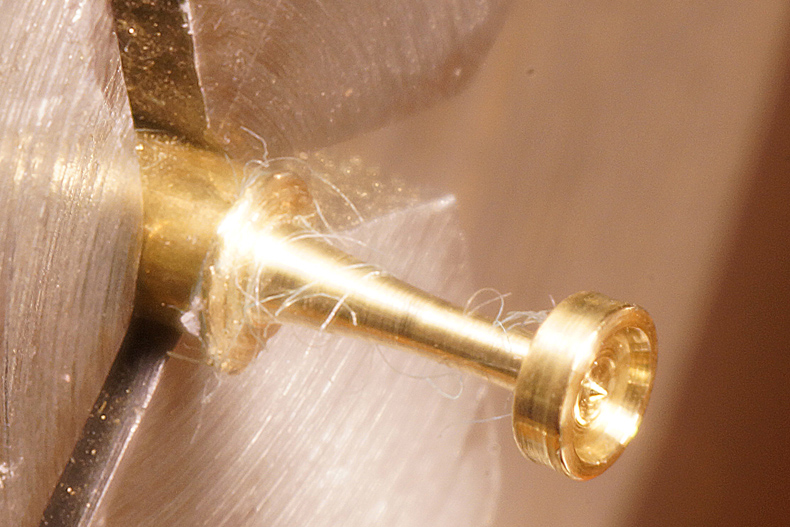 |
This included five gauges. I turned them from 2.0 mm brass rod. The photo show the complete gauge turned on my lathe, including a stem of approximately 0.7 mm wide. |
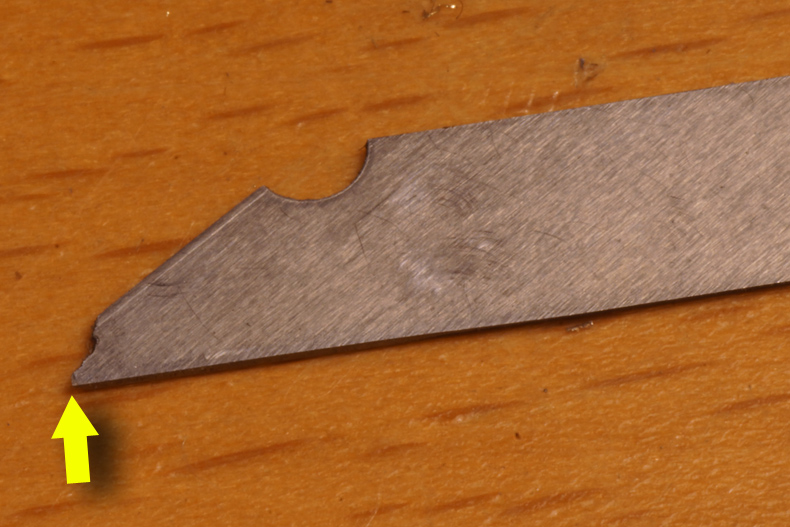 |
I cut the inside of the gauge with a end of a knife blade which I filed to size with a diamond file and then ground it as a suitable chisel. |
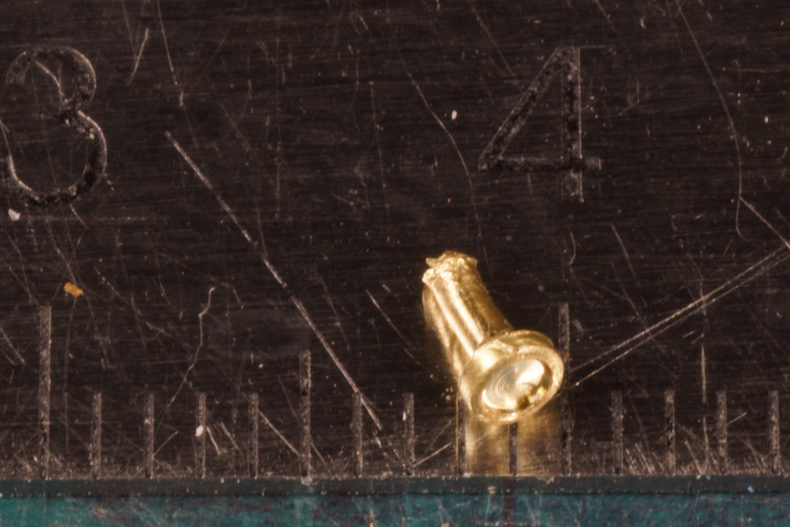 |
One done, four to go |
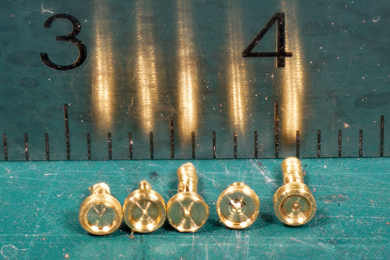 |
All five. The photo harshly shows that I was not able to produce a consistent widht of the gauge rims. The second from left has a very thicj rim whereas the middle gauge has an exquisitely thin rim. I decided to leave it, as all the gauges were slightly different anyway |
I also filed a regulator handle from nickel silver |
|
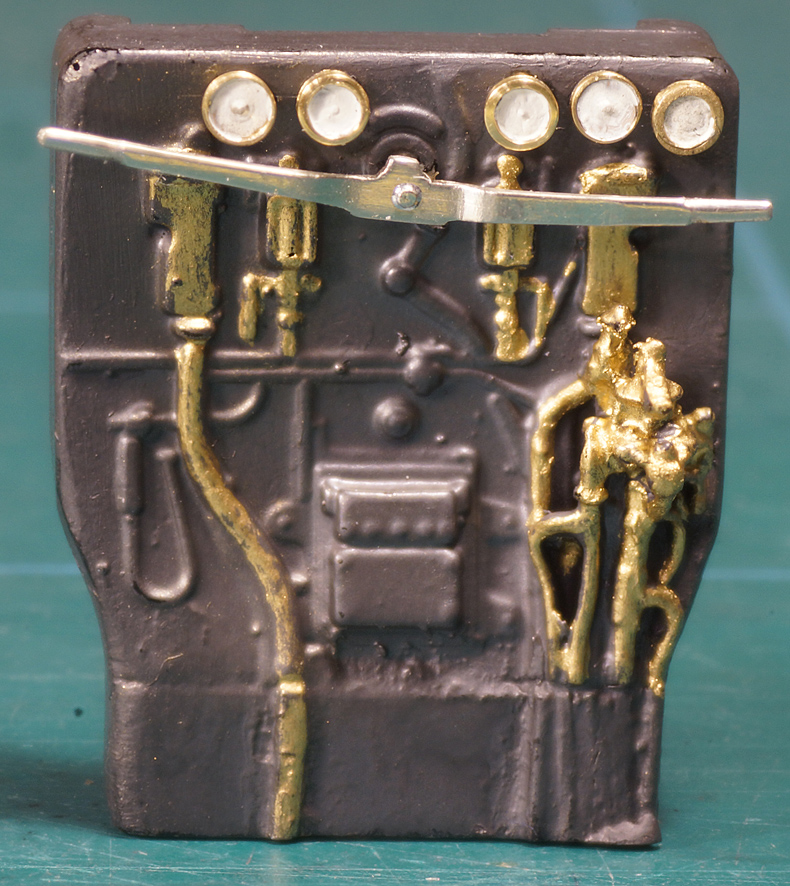 |
This is almost the end result. I did some touching up after the photo, as the photo revealed a few flaws I had overlooked.
In hindsight I should have taken another course. I should have painted the entire backhead in Alclad Brass fits, then cover what should be black. That whould have resulted in far more striking brass parts.
I did not paint the backhead black. I used Revell 27004 Metal Coat, Gunmetal. This paint gets en metal sheen when you rub it after drying. This makes the backhead more realistic then plain black. |
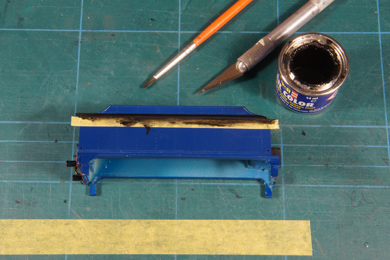 |
I am now slowly getting to lingn the model. But before that I needed the curved tender top black.
While doing so I incidentally did a very great find. I always used the sides of the masking tape as it came from the roll. It always irrtated me this these side were always a bit rough and frayed. By sheer coincidence I found that you get far crispier clear straight lines when cut the original side off by 2 mm with a absolutely sharp fresh blade. Another lesson learned. |
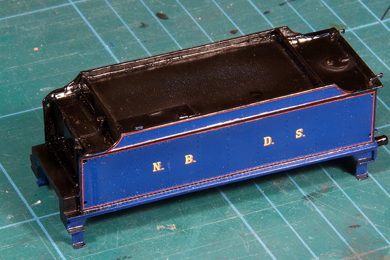
Lining |
|
Everything was ready to start lining with the decals when I found my bottle of MicroSol had self emptied during storage since lining my NS 5000. There was only a little bit of fluid left.. |
|
I tried with just one decal to add a line, but I found the remaining MicroSol would not work well. It still had the right smell but I suspect one of the active ingeredients had evaporated. The decal hardly reacted despite multiple treatments. So I ordered new bottles, at the same time replenishing the MicroSet solution as well, and will have to wait for the order to arrive. I am not particularly optimistic on that: it is Friday (24 April 2020) now and with the package carriers struggling to keep up with the surge in demand due to the corona crisis and partial lockdown in the Netherlands I do not expect it to arrive tomorrow. As next Monday is a national holiday it won't be here until Tuesday. So I will turn to other remaining work for now. |
|
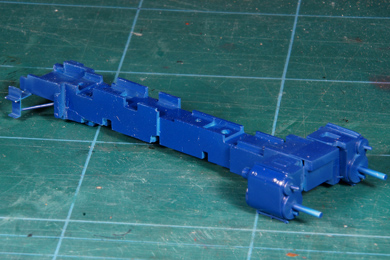
An urgent job I was procrastinating was painting of the wheels rims. I have never painted wheel rims before and I realised it woudl have to be very precise. Wheel rims are a very striking feature of the livery and an untidy job will impact the overall effect of the loco very negatively. It is like eyes painted just a bit off in a portait. It is also fiddly job. So I gave lenghty thought about a practical method to paint these wheels accurately. Eventually I found that keeping them in a frame and roll them would be the easiest way. The main objection aganist that I did not want to use the freshly painted frame of this loco in fear of damaging it. Then I thought of an old Raimo "Glaskasten" (German calss BR 98.3) frame that was in my bits and bobs box. Thta was just the answer I needed. The axle fit in, clamped the frame in my vise and I went to work. |
|
The old Raimo frame serving as a wheelrim painting tool. I held the brush loaded with paint and turned the wheel gently by pushing the other wheel. I found that it greatly helps pre-wetting the wheelrim with a very thin film of turpentine. The paint flowed more evenly and consistently. Paint used: Revell SM 302, brushed on with my trusted Windsor & Newton Series 7 size 0. The wheel treads were cleaned with cotton ear swabs wetted (not soaked) in turpentine.
|
|
The powered tender wheels were even easier, siwtich the motor on and hold the brush against the rim. To be honest, I don't think it makes the loco any prettier, but that is the way it was. |
|
 |
Having spent a most enjoyable evening painting the wheels I was totally surprised the next morning by the postman delivering the MicroSet I had ordered. That was quick! Modelbus.nl did a great job in instantly dispatching the order and despite being ordered on Friday amidst the corona crisis the delivery by Post.nl was prompt. Which made that I eventually lost no time completing this project. Drying time is a very significant parts of the time you are working on lining. Of course you can interweave different jobs, |
so for instance you cut more decals when others are drying, but that makes it all rather complex and I know that I am prone to err and mix up operations. So I do that sparingly. I usually have a job at the computer at hand, and do that job during the drying times of the decals. I did not bother to cut out the lines to their exact length. Instead I cut each line about 2 mm oversize and cut it in two. When applying the line on the tender, it let the two parts overlap to obtain the correct length. |
|
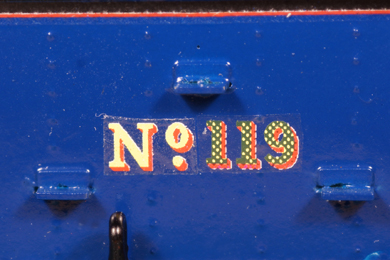 |
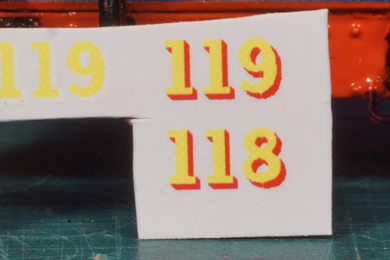
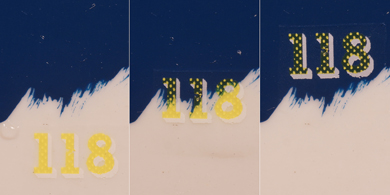
Now here's a problem I encountered. The problem is obvious: the number has completely different consistency as the prefix "No" and as the letters N.B. and D.S. on the previous photo. What's the story behind it? Well, when I bought the kit it soon occurred to me that the decals contained the locomotive numbers 117 and 118. But the numbers should have been 118 and 119. So I sent an email to the supplier because I insisted on building number 119. "Oh no problem", was the answer, "we know the problem. I will send you an extra set of numbers." And so he did. I stored the numbers and continued building. Now I got to the stage of actually using the decals it turns out they are distinctly different although at first sight they do appear to be the same. |
 |
|
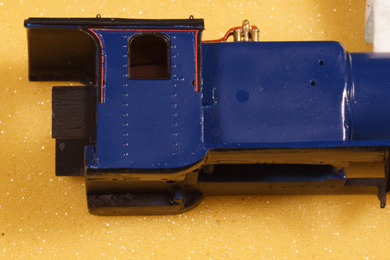
| The decals have no white backing to protect them from the dark underground. And this is what happens if they are transferred from white to a blue underground. | |
 |
Of course I mailed MK Modelbouwstudio again. But did not get a repsonse. Various colleague builders did not expect him to react any time soon because he was very busy building a commisioned layout. Ah. So now what? Wait for, well maybe months, with a very limited scope for success? Who else is building this particular number in this version? Nobody I know of. And would the supplier be willing to make new decals for me alone? Don't think so. So I decided to capitulate on my quest for 119 and use the number 118 from the original decals and carry on. At least I could now finish the loco in the days ahead. |
A first decal on the locomotive, showing how important the setting solution is. Without it, the decal will never settle nicely. |
|
 |
On the left cabside I tried to keep the decal in one piece as you can see on the photo above. This led to ugly corners of the transparant layer. After settling down of the decal the result already had improved but it was still very visible. I can only hope it will get better after spraying with clear coat. Another problem was that the decal's size did not quite correspond with the cab side's size. It was also difficult to handle such a large decal. So to avoid these problems I cut the right hand decal closer to the colours and cut it in four pieces |
 |
Which made it much easier to put the individueal quarters on the loco. With about 1 mm overlap on each side the cut became practically invisible.
The decals are not overly good. The black is chipped and does not cover the blue completely. |
 |
Here's nice trick. To measure the lining on the firebox I cut a strip from a Post-It, from the sticky side. I stuck it on the firebox, flush with the running board on the right side and gave it a knick where it should end on the left side. I tore it off, laid it on the cutting mat and measured the result. This way I obtained a very accurate measurement of this line. |
To give a general overview: on 28 April lining got to this stage |
|
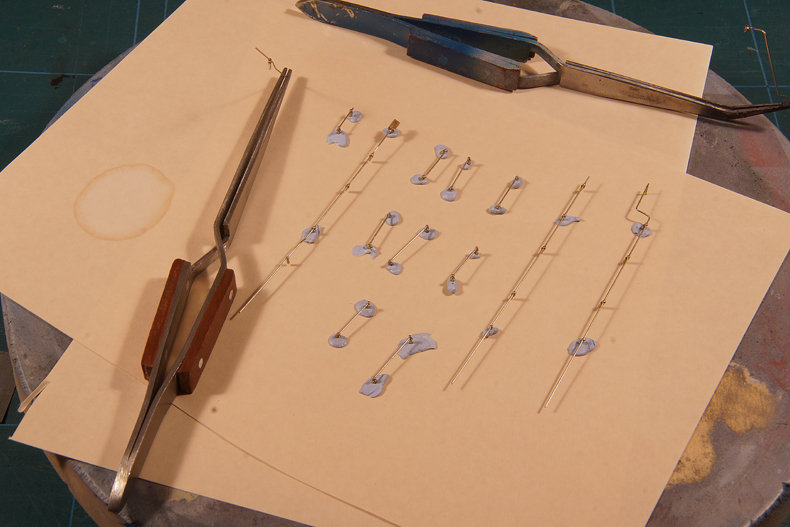
Here's the lining weaponry.
|
|
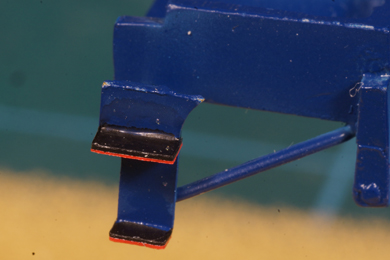 |
Applying tiny strips of red on the steps of the locomotive and tender. |
 |
And finally the airpump received it long awaited red lines. The bottom line has sagged a bit. Unfortunate but nothing I can do to change it. Luckily it practically invisible from normal viewing distance. This pump is 13 mm high |
|
During the lining I observed the model closely and found small blemishes on the paint work. I noted these and as soon as lining had been completed I went after these blemishes with a brush, checking off each chore once done. |
|
The chimney rim is damaged and that is rather sorry thing as I can not repair this invisibly with a brush. So I must spray it. |
Clear coat |
|
Next is spraying a clear coat. I carefully arranged the parts in the order I wanted to spray them. The least risky parts first, on the right side, so I could get the feel again. This is a job I do only once every year so I need to get that "feel" back. |
|
The last one done, and I am perfectly happy this coat, given the Philotrain semi-gloss. Personally I think the Philotrain clear coat is a bit too dull. I would prefer the somewhat more glossy effect of the uncoated paint. Warren Haywood has this effect on his locomotives. I need to try his trick. |
|
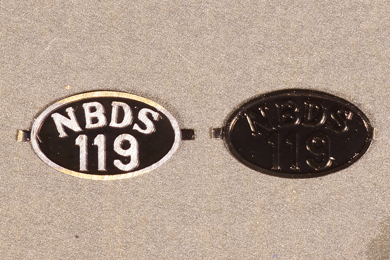 |
The number plates were supplied black. The idea is to rub them on fine (1200) sandpaper so the metal emerges. This is careful work. To improve the surface finish I added a drop of oil on the sandpaper. I used the 119 number as a training object and it worked well. |
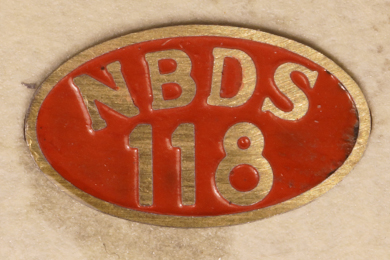 |
I filled the 118 number plates with the intended red background, let them dry. The next day I sanded them down. After sanding I degreased them and provided them with a gloss clear coat. Be ever so careful. these parts are very small and very thin. Do not bend them and after working them stick them to the sticky strip of a post-it in order not to loose them. |
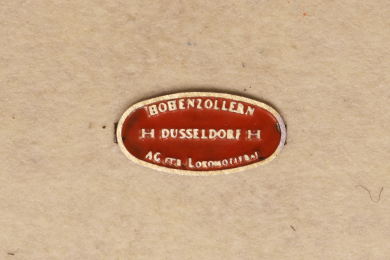 |
The builder's plate is even smaller (4 mm wide) and still readable. Commendable etch work! |
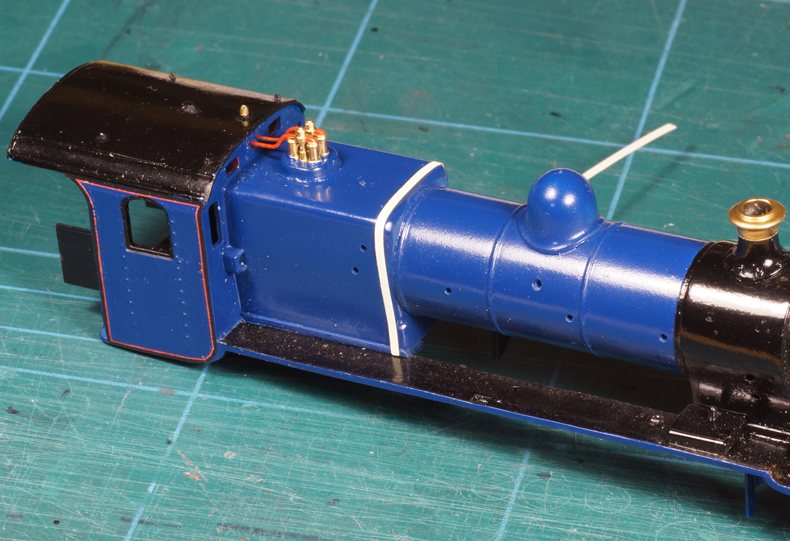
Finally the handrails are sprayed with a gloss coat. Now the time for the final assembly has come!! |
|


Sign my
GuestBook